How to Print Pendaflex Labels: A Step-by-Step Guide
It can be pretty hard to keep your workspace in order, but tools such as Pendaflex labels really do make a huge difference when it comes to staying on top of the files. They are really created with hanging file folders specifically for this reason-to quickly pinpoint your documents. Simple yet, quite powerful in filing systems.
This guide will take you through everything you need to know to print Pendaflex labels, from understanding their purpose to executing the process flawlessly.
What Are Pendaflex Labels?
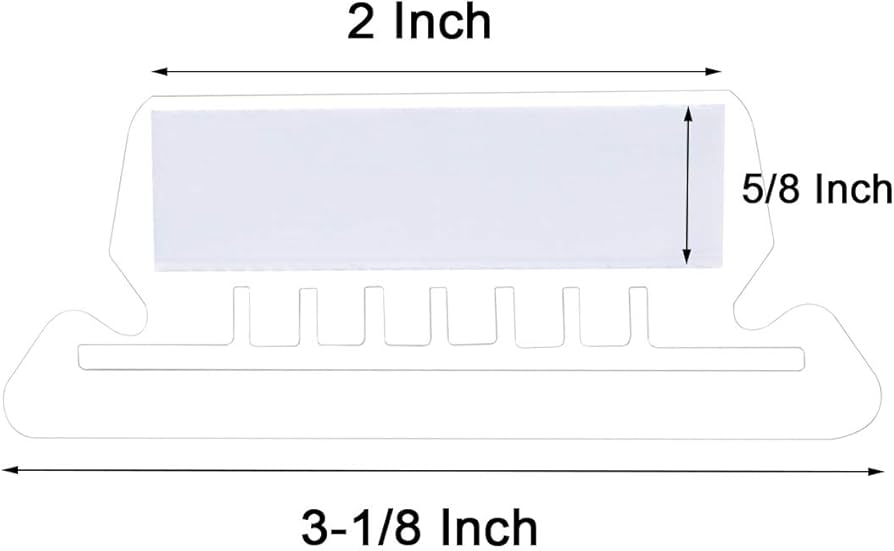
Pendaflex labels are small, tab-sized labels designed for hanging file folders. They’re perfect for marking categories, clients, or project names, helping you organize your files neatly. These labels are often color-coded, allowing for quick identification, and are compatible with various types of label sheets or pre-designed templates.
Why Use Pendaflex Labels?
- Enhanced Organization: They make it easier to group similar documents.
- Professional Look: Printed labels are neat and legible, which is ideal for workplaces.
- Time-Saving: Color-coded and properly labeled folders eliminate the need to dig through piles of paper.
Tools and Supplies Needed
Before you get started, gather the following tools and supplies to ensure a smooth process:
- Pendaflex Labels: Utilize labels that are pre-cut, and should fit hanging Pendaflex files.
- Printer: For labeling, any ordinary inkjet or laser printer can suffice the purpose.
- Templates: Downloadable templates compatible with your labels.
- Software: Use programs like Microsoft Word or Avery Design & Print for customization.
- Test Paper: Use plain paper for alignment testing before printing.
Step-by-Step Guide to Printing Pendaflex Labels
Step 1: Select the Right Template
The initial process of printing Pendaflex labels is selecting a template that corresponds to the layout of the label sheet. Most label manufacturers including Avery provide free downloadable templates.
Where to Find Templates:
Check the packaging of your Pendaflex labels for template numbers. You can find matching templates on the manufacturer’s website or through software like Microsoft Word.
How to Download:
After following all these steps, it’s time for you to download it and open the template you have chosen in the correct application.
Step 2: Customize the Labels
As you have your key template with you, it is now time to align the labels to your needs.
Add Text:
Enter the names or categories for each folder. For instance, you might use labels like Invoices, Contracts, or Client Records.
Format Your Text:
Choose a clear, legible font such as Arial or Times New Roman. Adjust the font size to ensure the text fits within the label area without overlapping.
Color-Coding:
Use colors strategically to differentiate categories. For example:
- Blue for financial records.
- Red for urgent projects.
- Green for completed tasks.
Add Logos or Icons (Optional):
If you’re using Pendaflex labels in a business setting, you can add a company logo or icons to enhance the professional appearance.
Step 3: Adjust Printer Settings
Proper printer settings are crucial for achieving accurate label alignment.
Paper Type:
Set your printer to recognize label sheets, typically under “Labels” or “Heavy Paper” settings.
Page Orientation:
Ensure the orientation matches the template’s layout. Most label sheets require a “Portrait” setting.
Alignment Test:
Before printing on your actual label sheet, run a test print on plain paper to verify alignment. Place the test sheet over your labels to check for proper fit.
Step 4: Print Your Labels
Once you’ve confirmed alignment, load the label sheet into your printer’s manual feed tray.
- Double-check the sheet’s orientation to avoid printing on the wrong side.
- Print your labels and allow them to dry for a few seconds before handling.
Troubleshooting Common Issues
While printing Pendaflex labels is straightforward, you might encounter occasional hiccups. Here’s how to address them:
Misalignment:
- Check if the template size matches your label sheet.
- Ensure the printer’s paper guides are set correctly.
Smudged Ink:
- Use high-quality label sheets compatible with your printer.
- Allow ink to dry before touching the labels.
Printer Jams:
- Confirm that you’re using sheets designed for your printer type (inkjet or laser).
- Avoid overloading the paper tray.
Alternative Methods for Creating Pendaflex Labels
If you don’t have access to a printer or templates, consider these alternatives:
Handwritten Labels:
- Use a fine-tipped marker or pen for clean, legible writing.
- Though less polished, handwritten labels can be a quick fix.
Label-Making Machines:
- Devices like Dymo or Brother label makers can print custom-sized labels directly.
- These are ideal for small-scale labeling tasks.
Professional Printing Services:
- Outsourcing to a print shop ensures high-quality results, especially for bulk printing.
Tips for Perfect Pendaflex Labels
To make the most of your Pendaflex labels, follow these pro tips:
- Use Clear Covers: Protect your printed labels with clear plastic tabs that fit into Pendaflex folder slots.
- Store Extras: Keep unused labels and templates for future updates to your filing system.
- Optimize for Readability: Stick to simple text and avoid overcrowding the labels with too much information.
- Stay Consistent: Develop a consistent labeling format to maintain uniformity across your files.
Benefits of Printing Pendaflex Labels
Printing Pendaflex labels is a simple yet powerful way to streamline your office organization and maintain a professional, polished appearance.
- Enhanced Organization: Printed labels ensure neat, legible, and consistent labeling for folders, making it easy to categorize and locate documents.
- Professional Appearance: Printed labels create a polished, uniform look, ideal for offices or presentations.
- Time-Saving: Instead of writing labels manually, using labels that can be printed in a batch saves time compared to writing labels for each set.
- Error Reduction: Compared to manually written labels, printed ones are more accurate and help reduce risk factors.
- Versatility: It is versatile, and beneficial for file folders, binders, and other office products, making the final improvements to the useful purpose.
- Compatibility: Designed to work with popular printing software and templates, simplifying the process.
FAQs
Q1: Can I print Pendaflex labels without a template?
Yes, but using a template ensures better accuracy and alignment. If you don’t have a template, measure the label dimensions and create a custom layout in your software.
Q2: What if my printer doesn’t support label sheets?
Consider using printable adhesive paper and cutting the labels manually to fit Pendaflex tabs.
Q3: How do I prevent labels from peeling off over time?
Use high-quality adhesive labels and pair them with clear plastic covers for added protection.
Conclusion
Printing Pendaflex labels is one key objective of gaining a more effective filing method. This guide can help you develop an effective label that is also attractive to the eye. Whether you are sorting office records, personal papers, or documents related to a certain project, these labels can be useful, increase productivity, and look professional.
Ready to upgrade your filing system? Start printing your Pendaflex labels today and experience the difference!
Looking for Pendaflex products, visit Garafour today. Shop now and make your space shine!
Warehouse Locations
- Albany, NY
- Atlanta, GA
- Baltimore, MD
- Birmingham, AL
- Boston, MA
- Charlotte, NC
- Chicago, IL
- Cincinnati, OH
- Columbus, OH
- Cleveland, OH
- Cranbury, NJ
- Dallas, TX
- Denver, CO
- Detroit, MI
- Fort Lauderdale, FL
- Grand Rapids, MI
- Harrisburg, PA
- Houston, TX
- Indianapolis, IN
- Jacksonville, FL
- Kansas City, MO
- Los Angeles, CA
- Memphis, TN
- Miami, FL
- Minneapolis, MN
- Nashville, TN
- New Orleans, LA
- New York, NY
- Orlando, FL
- Philadelphia, PA
- Phoenix, AZ
- Pittsburgh, PA


